This optional exercise gives you the opportunity to work with multiple tracks in Audacity and to manipulate the clips you're using so they're heard either sequentially (clip 1, clip2, clip3, etc.) or mixed together.
Suggestion: if you are going to use your own music for this exercise first download the zip file below (step 2) and work with those audio clips to become familiar with the technical aspects of the exercise. Then, get creative with your own music clips.
Instructions
- If you want to use your own music excerpts:
- Create the individual audio clips following the procedures used in the first two audio exercises.
- Save an MP3, WAV or AIFF version of each of the clips you create in your folder. (WAV or AIFF would be better so you're working with better quality audio. (As mentioned in class compressing an audio file can reduce audio quality. We compress files to reduce the file size. We compromise quality for file size. Always try to work with uncompressed audio when creating a project.)
- Once your clips are created, go to step 4.
- If you'd rather use some premade audio clips, download this zip file . If you're working in the lab click the above link, go to the Downloads folder and double-click the zip file to uncompress it and extract its contents, then move the "exercise3" folder from Downloads into your folder. You can also right-click the preceding link and choose Save Target As, Save Link As or Download Linked File As, or a similar command (depending on the browser you're using), navigate to your folder, save the zip file there, then extract (if necessary) the contents of the zip file into your folder.
- Open one of the audio clips in Audacity, then use File menu > Import > Audio to add the remaining tracks. (If you choose File > Open to add clips to a project, Audacity will open the file(s) in a separate window - starting a new project.)
- To manipulate your clips you can use several new tools and controls in Audacity. Open the Help menu and choose Quick Help to learn more about these items. (Note: the following instructions are for Audacity 2.0.1. Navigating through Quick Help in older versions of Audacity may differ.)
 Under Reference in the left column, choose Toolbars, then Tools Toolbar to learn about the TimeShift and Envelope tools.
- Then, choose Using Audactiy in the left column, and click Audio Tracks under Understanding Audacity in the right column to learn about the Track Control Panel, especially the horizontal slider Gain control for each track.
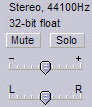
- (You can also use each track's Pan control in this exercise, but for a ringtone heard on a cellphone, the effect of this control won't be very noticeable.)
- When done, export an MP3 version of your multitrack ringtone with a 128 kbps bit rate.
- Choose Export from the File menu.
- Set the format to MP3.
- Click the Options buttons and change the bitrate to the desired rate.
- Make sure you export this file to your folder.
Ringtone Example Using the Clips Downloaded in Step 2
Another Version Using a Different Backing Track
